In this ultimate guide on how to set up a guppy fish tank we will be going through the steps on guppy fish tank setup.
Whether you’re a beginner or an experienced hobbyist, guppy fish tank setup is a rewarding journey that encompasses various aspects, from guppy tank setup and care to meeting the specific requirements of these delightful fish.
In this comprehensive guide, we’ll look into the intricacies of guppy tank setup, care, and maintenance. We’ll explore guppy aquarium setup, the process of guppy fish tank cycling, and how to decorate your tank with suitable ornaments and plants. We’ll also discuss the vital equipment such as filters, heaters, and thermometers, all of which play pivotal roles in maintaining the optimal guppy fish tank environment.
The 7 steps on How to Setup A Guppy Fish Tan
Step 1: Gather Your guppy aquarium setup Supplies
The first step in setting up a guppy fish tank is before you begin, gather all the necessary guppy fish tank supplies and guppy fish tank equipment. Here’s a list of the guppy fish tank equipment you’ll need:
- Tank: Choose a tank with a suitable size, typically 10 to 20 gallons for a small group of guppies.
- Substrate: Use fine gravel, sand, or aqua soil as your guppy fish tank setup base.
- Filtration System: Select a reliable filter with adjustable flow to maintain water quality.
- Heater: Install a heater to maintain a stable water temperature between 72-82°F (22-28°C).
- Thermometer: Place a thermometer in the tank to monitor water temperature accurately.
- Decorations: Provide hiding spots and ornaments for your guppies. Ensure they are safe and aquarium-friendly.
- Plants: Choose live or artificial plants. Live plants help oxygenate the water and provide shelter.
- Lighting: Use low to moderate lighting to prevent algae growth. A timer can help maintain a consistent light cycle.
- Water Conditioner: Have a water conditioner on hand to treat tap water and make it safe for fish.
- Test Kit: Purchase a water test kit to monitor pH, ammonia, nitrite, and nitrate levels.
Step 2: Clean the Tank Thoroughly
A clean tank not only provides a safe environment for your fish but also prevents potential guppy aquarium setup water quality issues down the road.
1. Rinse the Tank
Start by thoroughly rinsing the tank with warm water. This step is essential to remove any dust, dirt, or residues that may have accumulated during storage or manufacturing. Here’s how to do it:
- Empty the Tank: If the tank has any stickers or labels, remove them carefully. Empty out any packaging materials or debris.
- Warm Water Rinse: Use a gentle stream of warm tap water to rinse the interior and exterior of the tank. You can use a soft cloth or sponge to wipe away stubborn residues. Avoid using soap or harsh chemicals, as even trace amounts can be harmful to your fish.
- Tank Inspection: While rinsing, inspect the tank for any scratches, cracks, or imperfections. It’s crucial to address any structural issues before proceeding.
2. Sanitize (Optional)
While rinsing with warm water is usually sufficient, some aquarists choose to sanitize their tanks further. This step can be important if you’re setting up a used tank or one that has been in storage for an extended period. Here’s how to sanitize your tank:
- Vinegar Solution: Mix a solution of one part white vinegar to three parts water. Use this mixture to wipe down the interior of the tank and any accessories, such as rocks or decorations. Rinse thoroughly with water afterward to remove any residual vinegar.
- Bleach Solution (Caution): If you suspect the tank may harbor harmful pathogens, you can use a bleach solution. Mix one part bleach to nine parts water. Thoroughly rinse and soak the tank and accessories in this solution for 15-20 minutes. Rinse the tank and accessories thoroughly afterward and let them air dry.
Note: Be extremely cautious in your guppy tank setup when using bleach, as even small amounts can be toxic to fish. Ensure that the tank and accessories are entirely free of bleach odor before proceeding.
3. Final Inspection
Once you’ve cleaned and, if necessary, sanitized the tank, perform a guppy aquarium setup final inspection:
- Check for Residue: Make sure there are no remaining residues or cleaning agents on any surface of the tank or accessories.
- Inspect Seams and Seals: Examine the seams and seals of the tank for any signs of damage, wear, or leakage. A leaky tank can lead to disaster, so address any issues promptly.
Step 3: Add Substrate for a Natural Habitat
Choosing the right substrate and properly installing it in your Freshwater guppy fish tank is crucial for replicating their natural habitat.
1. Selecting the Substrate
Before you add substrate, it’s essential to choose the right type.
- Fine Gravel: Fine gravel, often referred to as aquarium gravel, is a popular choice. It comes in various colors, allowing you to customize the look of your tank. The fine texture is suitable for guppies and is easy to clean.
- Sand: Sand is another option and can create a natural appearance, especially in tanks with live plants. Guppies enjoy sifting through sand, but it can require more maintenance to prevent debris buildup.
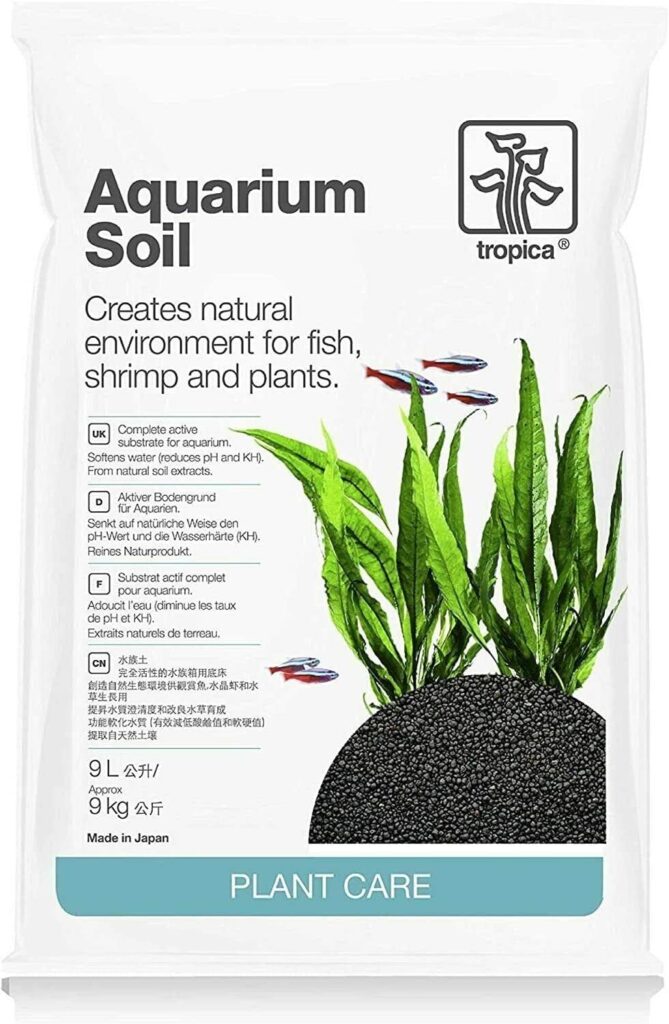
- Aquarium Soil: Specifically designed for planted tanks, aquarium soil contains essential nutrients for plant growth. If you plan to have live plants in your guppy tank, this substrate option can be beneficial.
- Capped Substrate: In planted tanks, some aquarists use a layered approach where nutrient-rich substrate is capped with a layer of fine gravel or sand. This allows for healthy plant growth while maintaining a clean appearance.
2. Adding the Substrate
Properly adding the substrate ensures an even and stable base for your tank:
- Clean the Substrate: Before adding it to the tank, rinse the substrate thoroughly with water. This step removes any dust or debris, preventing cloudiness in the water.
- Layering: Begin by adding a layer of substrate to the bottom of the tank. The thickness of the layer depends on your preference but typically ranges from 1 to 2 inches (2.5 to 5 cm). You can create varying depths to add depth and dimension to your aquascape.
- Sloped Substrate: Some aquarists choose to create a sloping substrate, with the front being lower and the back higher. This can enhance the visual appeal of the tank and create a more natural appearance.
- Planting: If you plan to include live plants, consider planting them as you add the substrate. Use your fingers or planting tools to make small holes for the plants’ roots. Ensure that the plants are firmly rooted in the substrate.
- Smooth and Level: After adding the substrate, smooth and level it with your hand or a flat tool. Avoid abrupt changes in height or gaps that could trap debris.
By choosing the right substrate and properly installing it, you create a foundation for a healthy and pleasing guppy fish tank. The substrate not only improves the tank’s appearance but also provides a guppy fish tank setup environment for your guppies and any live plants you may have.
Step 4: Install a Guppy fish tank Filter and Heater

Installing the filtration system and heater in your guppy fish tank is one of the most important parts of a guppy tank setup. These components work together to ensure proper water circulation, filtration, and temperature control, all of which are critical for the well-being of your guppies.
1. Selecting the Right guppy tank setup Filtration system
Choosing the appropriate filtration system for your guppy tank depends on the tank size and your specific needs. There are three primary types of filtration:
- Mechanical Filtration: This type of filtration physically removes debris and particles from the water, keeping it clear. It typically involves a filter sponge, filter floss, or a mechanical filter pad. Mechanical filtration helps prevent clogs in other filter media.
- Biological Filtration: Biological filtration is crucial for maintaining water quality. It involves beneficial bacteria that break down harmful ammonia and nitrites into less toxic nitrates. Most filters have a dedicated area for biological filtration, often filled with ceramic rings or bio-balls.
- Chemical Filtration: Chemical filtration uses activated carbon or other chemical filter media to remove impurities and odors from the water. While not always necessary, it can be useful in specific situations, such as removing medications or discoloration from the water.
2. Proper Filtration Placement
Proper placement of the filter is essential for efficient water circulation and filtration:
- Water Flow: Position the filter outlet to ensure gentle water flow. Guppies prefer calm waters, so avoid strong currents that could stress them.
- Filter Media: Follow the manufacturer’s instructions for setting up the filter media. Typically, mechanical filtration should be the first stage, followed by biological and, if used, chemical filtration.
- Regular Maintenance: Clean the filter regularly to prevent clogs and maintain its efficiency. Rinse mechanical filter media in tank water rather than tap water to preserve beneficial bacteria.
3. Installing the Heater
Maintaining a stable water temperature is crucial for the health and comfort of your guppies. Here’s how to install a heater effectively:
- Positioning: Place the heater in an area with good water circulation, typically near the filter intake. This allows for even heat distribution throughout the tank.
- Thermostat Settings: Set the heater’s thermostat to the desired temperature range for guppies, which is typically between 72-82°F (22-28°C). Use a reliable thermometer to monitor the water temperature regularly.
- Submersible Heaters: Submersible heaters are designed to be fully submerged in water. Ensure that the heater is securely in place and completely underwater.
- Safety Precautions: Use a heater guard or protective cover to prevent your guppies from coming into direct contact with the heater, reducing the risk of burns or injuries.
4. Ensuring Filtration and Heating Redundancy
To ensure the well-being of your guppies, consider redundancy in both filtration and heating:
- Backup Filtration: Consider having a backup filter or sponge filter in case your primary filter fails. This prevents a sudden drop in water quality.
- Dual Heaters: For larger tanks, using two smaller heaters can provide redundancy in case one fails. This also helps maintain more even temperature distribution.
- Thermometer Placement: Position multiple thermometers in different areas of the tank to monitor temperature variations and ensure uniform heating.
Step 5: Decorate the Tank to Create a Guppy Paradise
Decorating your guppy fish tank not only adds visual appeal but also plays a crucial role in providing hiding spots, territories, and enrichment for your fish. A well-decorated tank mimics a natural habitat, making your guppies feel safe and reducing stress. Here’s how to adorn your tank effectively:
1. Create Hiding Spots
Guppies, like many fish, appreciate places where they can retreat and hide. This is especially important if you have multiple guppies or other tank mates. Here are some ways to create hiding spots:
- Caves and Hideouts: Decorative caves, tunnels, and hideouts provide excellent hiding spots. You can find these in various designs, from rocky caves to tree trunk replicas.
- Rocks and Driftwood: Stacking rocks or using driftwood can create natural-looking hiding spots. Ensure these decorations are securely placed to prevent them from toppling and injuring your fish.
- Terracotta Pots: Inverted terracotta pots make simple yet effective hiding places. Be sure to smooth any rough edges to avoid injuring your fish.
2. Use Decorative Ornaments
Ornaments and decorations not only provide shelter but also enhance the visual appeal of your tank:
- Castles and Ruins: Miniature castles, sunken ships, and underwater ruins add an interesting theme to your tank while creating hiding spaces. Ensure there are no sharp edges that could harm your guppies.
- Pirate Shipwrecks: Pirate-themed decorations, complete with cannons and treasure chests, can make your tank more exciting.
- Underwater Plants: Artificial plants with vibrant colors and unique shapes can serve as both decorations and hiding spots for guppies.
3. Balance Open Spaces
While hiding spots are essential, it’s also crucial to provide open swimming spaces for your guppies. Balance the decorations to ensure there is enough room for them to swim freely and display their vibrant colors.
- Layout Planning: Before adding decorations, plan the layout to create a visually appealing design that incorporates open areas and hiding spots.
- Avoid Overcrowding: Don’t overcrowd the tank with too many decorations. A cluttered tank can stress your guppies and impede their movement.
4. Incorporate Natural Elements
To make your tank feel more like a natural aquatic habitat, consider incorporating natural elements:
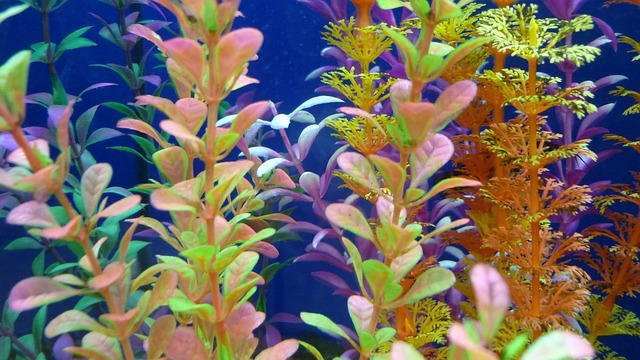
- Live Plants: Live aquatic plants, such as Java Fern, Anubias, and Vallisneria, not only provide oxygen but also create natural hiding spots. They also help maintain water quality by absorbing nitrates.
- Natural Substrate: If you haven’t already added substrate (step 3), consider using natural-colored gravel or sand to create a more realistic underwater environment.
- Driftwood and Rocks: Real driftwood and aquarium-safe rocks can create a natural appearance. Ensure that they are thoroughly cleaned and safe for aquarium use.
5. Aesthetic Considerations
While creating a suitable environment for your guppies is the top priority, aesthetics also matter. Think about the overall look you want to achieve:
- Color Scheme: Choose decorations and substrate that complement the colors of your guppies. Vibrant guppies can look stunning against a backdrop of contrasting colors.
- Lighting: Proper lighting can enhance the appearance of your decorations and guppies. Experiment with different lighting options to find the one that best showcases your tank.
Step 6: Add Water to Your Guppy Fish Tank
Filling your guppy fish tank with water is a critical step in the setup process. The quality of the water you use and how you add it to the tank can significantly impact the health and well-being of your guppies. Here’s how to add water to your guppy tank correctly:
1. Use Dechlorinated Water
Tap water typically contains chlorine and chloramines, which are harmful to fish. Therefore, it’s crucial to treat your tap water with a dechlorinator or water conditioner before adding it to your guppy tank. Follow these steps:
- Fill a clean container with the desired amount of tap water.
- Add the appropriate amount of water conditioner according to the product’s instructions. Be sure to measure carefully to avoid under- or over-treating the water.
- Stir the water conditioner into the container to ensure even distribution.
- Allow the treated water to sit for a few minutes to neutralize the chlorine and chloramines.
2. Gradual Temperature Adjustment
To prevent temperature shock, match the temperature of the treated water to the water in your tank. Here’s how to do it:
- Measure the temperature of the treated water using a reliable thermometer.
- Ensure that the temperature of the treated water matches the current water temperature in your tank. Guppies prefer a temperature range of 72-82°F (22-28°C).
- If there is a significant temperature difference between the treated water and the tank water, gradually adjust the treated water’s temperature by adding small amounts of heated or cooled water until it matches the tank’s temperature.
3. Adding Water to the Tank
Now that you have treated and temperature-matched water, it’s time to add it to your guppy tank. Follow these steps:
- Turn Off Equipment: Before adding water, turn off any equipment such as heaters and filters to prevent damage or disturbances during the process.
- Use a Water Container: Pour the treated water gently into the tank using a clean container or a hose with a slow flow rate. This helps prevent disturbing the substrate and decorations.
- Position the Container: Hold the container above the water’s surface, allowing the treated water to gently flow into the tank. Pour the water against a decoration or use a plate to disperse the water flow, further reducing disturbance.
- Avoid Agitating the Substrate: Minimize agitation of the substrate and decorations to prevent cloudiness. Gently pour the water near the tank’s wall to minimize disruption.
- Monitor Water Level: As you add water, periodically check the water level to ensure you don’t overfill the tank. Leave some space at the top to prevent splashing and ensure your tank’s lid fits securely.
By using dechlorinated water, matching the temperature, and adding water gently and carefully, you provide a safe and suitable aquatic environment for your guppies. Proper water management is a key factor in their health and happiness, so be diligent in maintaining water quality as your tank matures.
Step 7: Install Thermometer for Your guppy fish tank setup
Place the thermometer in the tank:
- Position it where it’s easily visible and can be read without disturbing the fish.
Step 8: Cycle Your Guppy Fish Tank for Optimal Water Quality
Cycling your guppy fish tank is a crucial step in establishing a stable and healthy aquatic environment. This process allows beneficial bacteria to develop, which helps convert harmful ammonia and nitrites into less toxic nitrates. Proper cycling is essential to ensure the well-being of your guppies.
Here’s a detailed guide on how to cycle your guppy tank:
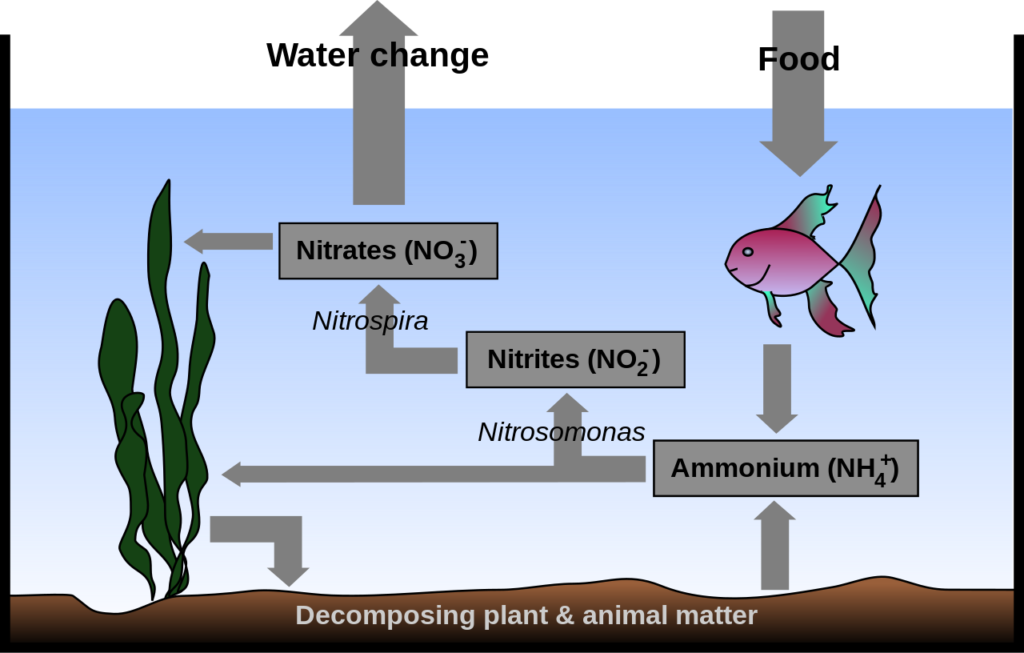
1. Understanding the Nitrogen Cycle
The nitrogen cycle is a natural biological process that occurs in all aquariums. It involves beneficial bacteria that break down waste products produced by fish and decaying organic matter. Here’s how it works:
- Ammonia Production: Fish excrete ammonia as waste, which can be harmful if it accumulates in the tank. Uneaten food and decaying plant matter also contribute to ammonia production.
- Beneficial Bacteria: Beneficial bacteria, primarily Nitrosomonas, convert ammonia into nitrite, which is still toxic to fish.
- Further Conversion: Another group of beneficial bacteria, Nitrobacter, then converts nitrite into nitrate, which is much less toxic. Nitrates can be removed from the tank through water changes.
2. Starting the Cycling Process
To kickstart the cycling process in your guppy tank, follow these steps:
- Water and Substrate: Ensure that you have filled the tank with dechlorinated water and added the substrate (Step 6).
- Add a Source of Ammonia: Introduce a source of ammonia to the tank. You can use fish food, a small piece of raw shrimp, or an ammonia source designed for cycling. These items will decompose and release ammonia into the water.
- Use Bacterial Supplements (Optional): Some aquarists choose to add commercial bacterial supplements that contain beneficial bacteria cultures. This can help speed up the cycling process.
3. Regular Water Testing
Testing the water is a crucial part of the cycling process. Use a water test kit to monitor ammonia and nitrite levels. Here’s how to proceed:
- Ammonia Testing: Test the ammonia levels every few days. As ammonia is initially produced, its concentration will rise.
- Nitrite Testing: As the cycle progresses, you’ll start to see a rise in nitrite levels. Continue testing regularly.
4. Monitoring the Nitrogen Cycle
During the cycling process, you’ll observe changes in water parameters:
- Ammonia Spikes: Initially, ammonia levels will spike as the ammonia-producing bacteria colonize the tank.
- Nitrite Peaks: As the ammonia-producing bacteria establish themselves, nitrite levels will increase.
- Nitrates Begin to Accumulate: As nitrite levels peak and begin to decrease, nitrates will start to accumulate. This is a sign that the cycling process is nearing completion.
5. Patience Is Key
Cycling your guppy tank requires patience. The process can take several weeks to complete. During this time, it’s essential to resist the urge to add fish to the tank.
6. Completing the Cycle
You’ll know the nitrogen cycle is complete when:
- Ammonia and nitrite levels consistently read zero in your water tests.
- Nitrates are present in the water, indicating that the nitrate-producing bacteria have established.
7. Performing a Water Change
After completing the cycle, perform a partial water change (20-30%) to reduce nitrate levels, which can accumulate over time. This helps maintain optimal water quality for your guppies.
8. Introducing Guppies
Once the tank has completed the nitrogen cycle, you can safely introduce your guppies. Start with a small number and monitor water parameters to ensure they remain stable as you gradually increase the fish population.